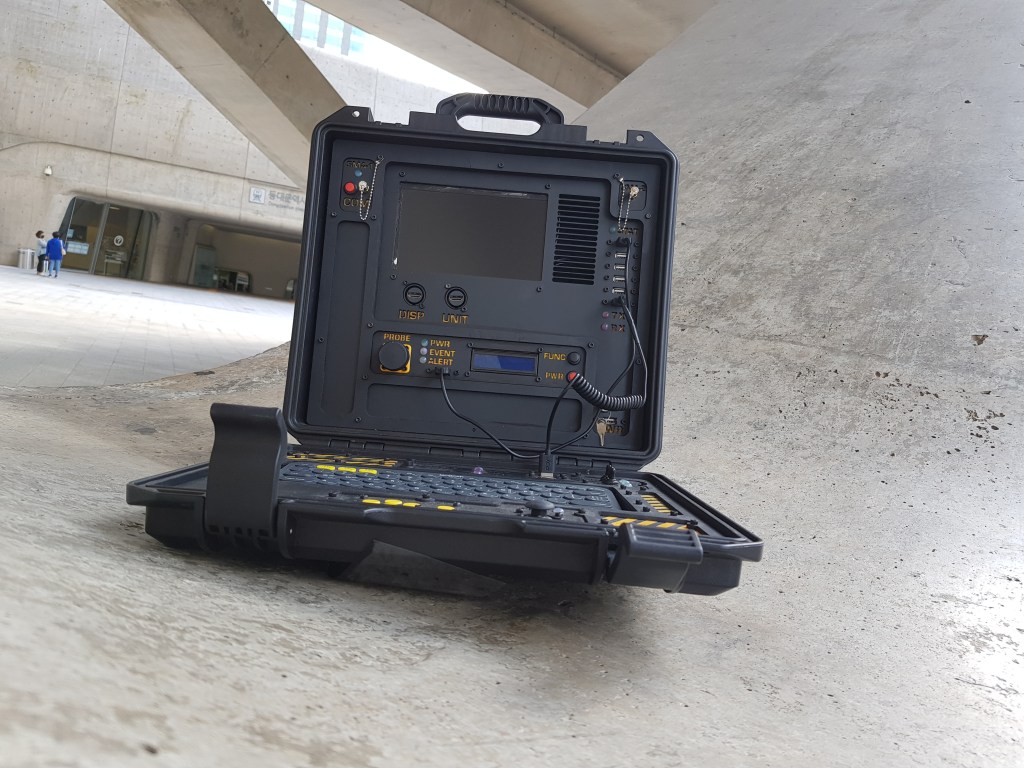
TLDR: I built a Raspberry Pi 3 luggable cyberdeck, with a built-in geiger counter that measures ionizing radiation.
ORIGIN STORY:
NATO designation: RATIS (Remote Assault and Tactical Intelligence System)
Unknown to both the West and the USSR, by 1972 the Apartheid government already possessed limited but potent nuclear capabilities, although only aircraft deliverable at this point.

After the Vela incident in 1979, where America directly detected but turned a blind eye to the regime’s surface nuclear testing, the wielding of such weapons became increasingly politically dangerous, and had the potential to result in even more pressure from both sides of the world, and even resulting in direct action. This led the South African government to gradually lose interest in nuclear weapons, while putting more effort into the development of satellite-based ion-cannon systems, which, although a new and in many ways untested technology, offered many benefits, including being harder to detect by US Vela satellites, which were originally designed to detect surface nuclear detonations from space and not the much more lower intensity flash of an ion-cannon strike.
By 1976 South Africa already possessed limited orbital strike capabilities, but sanctions had hindered the Apartheid government’s ability to launch spotting satellites in the quantity and of the quality needed to provide timely intelligence coverage and the ability to make effective use of orbital strike capability.

This weakness, along with a rapid escalation of the 1980s border conflict, led to a realization of the need to develop lightweight, mobile uplink packages that could allow small teams to survey targets and relay this real-time targeting data to a strike satellites. The capabilities of such a package were extremely high: 1970-era first-generation strike satellites were always single-shot devices, meaning that a single strike was was extremely costly and could not afford to miss, as a second chance would not be possible.

Hence, the envisioned equipment would need fast processing power for targeting and encryption, would possess a reliable surface-to-space RF encoder and transmitter, light enough to be man-portable, and would be rugged enough to survive rapid deployments in the hot and dusty battlefields of Southern Africa: the “Meerkat” Afstandige Aanranding//Taktiese Intelligensie Stelsel.
The design and execution of prototypes was naturally entrusted to ARMSCOR in 1979, producing an unknown number of workable devices that entered limited-field use in 1982. Just as South Africa had leveraged close relationships with limited allies to develop nuclear weapons in the 1970s (France and Israel, but never confirmed even until today), so too the development of this complex equipment would be beyond the stand-alone R&D capabilities of 1980 ARMSCOR.

Most historians agree that the delicate RF and satellite uplink technology was likely developed with assistance from Taiwan, while the integrated elements would likely have been produced with clandestine assistance from Japan. Interestingly, this was the first project cyber-interface device that the Sendai optoelectronics group would take on, later to gradually expand into this market and eventually become the leader in cyberdeck interface technology by the early 2030s, restructuring as Ono-Sendai not long after.
With the fall of the USSR in 1989, followed soon by the Apartheid regime a few years later, the need for such expensive and over-specialized satellite uplink equipment fell away from the Southern Africa. No survivable examples are known to exist, but the core technology survived, bought over completely by Cyberdyne systems in 1993.
SPECS:
POWER: 18V@3000mAh internal battery
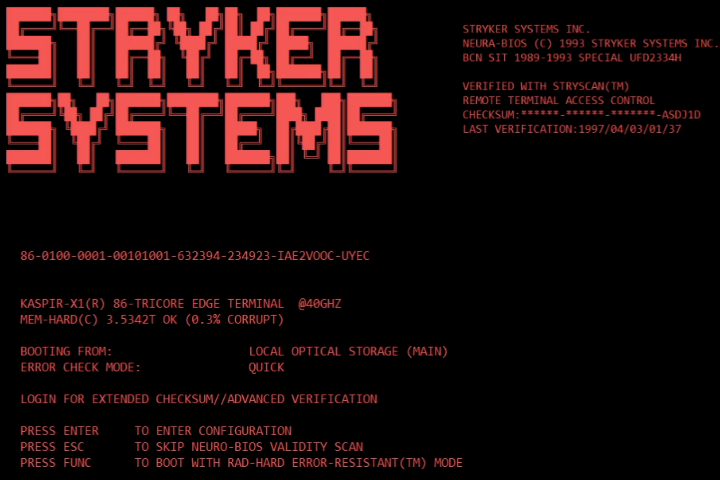
OS: STRYKER SYSTEMS OS-91
PROCESSOR: 40GHz KASPIR X1 86 TRICORE
STORAGE: RAD-HARD Stable-Mag™ 256Mb Hard-drive
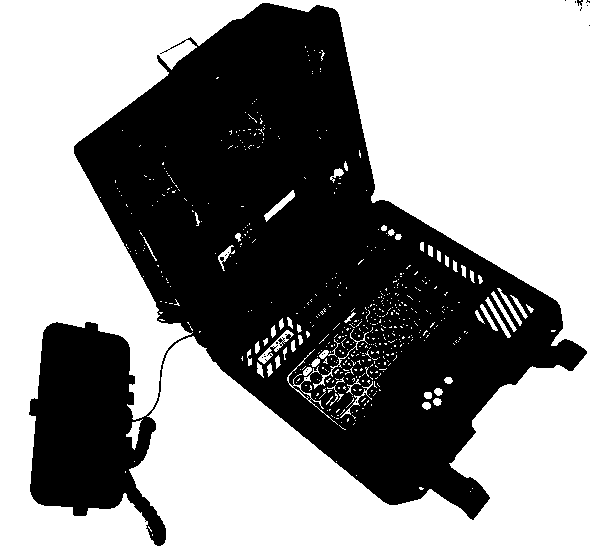
RF: 6W Dual-Antenna 586kb/s SATCOM Surface-to-Space Transciever (16W in boost-mode, requires external battery pack)
DISPLAY: 720×480
ADDITIONAL HARDWARE: 1x internal EZ-SENS™ hardpoint (RAD//CHEM//INFRA//REMOTE-SENTRY)
EZ-SENS™ RAD Module
SPECS:
2x tube Geiger Tube Probe
400V supply
5V power supply
Digital interfacing module with serial output


Above is all fiction. Below is the real story (or is it….?)
ACTUAL SPECS:
CORE:
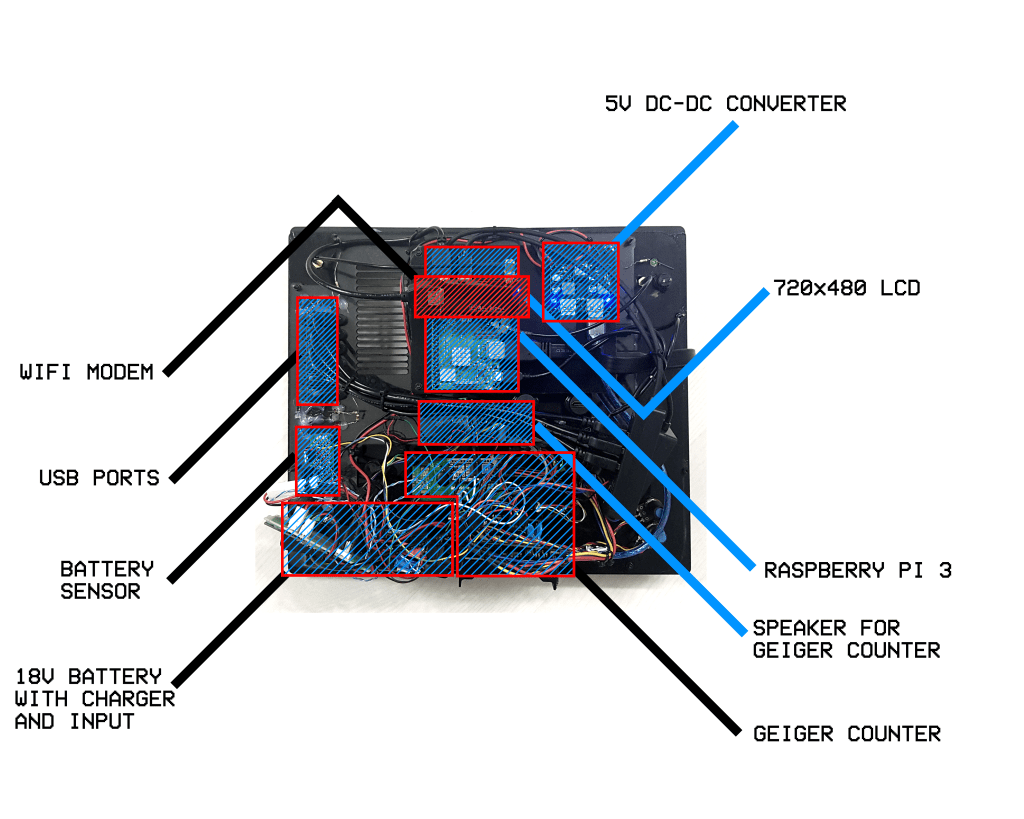
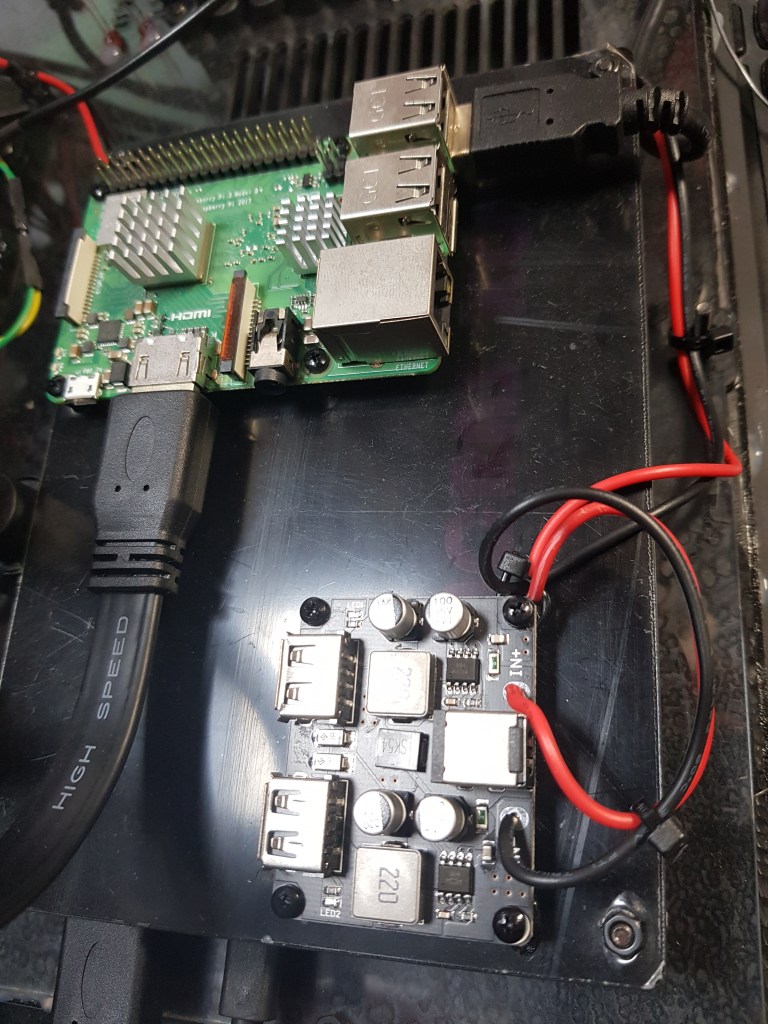
Raspberry Pi 3B with 16Gb SD card
720×480 USB LCD Display
3000mAh 18V vacuum cleaner battery
DC-DC Step-Down Dual-5V Power Supply
GEIGER COUNTER:
450V Power Supply
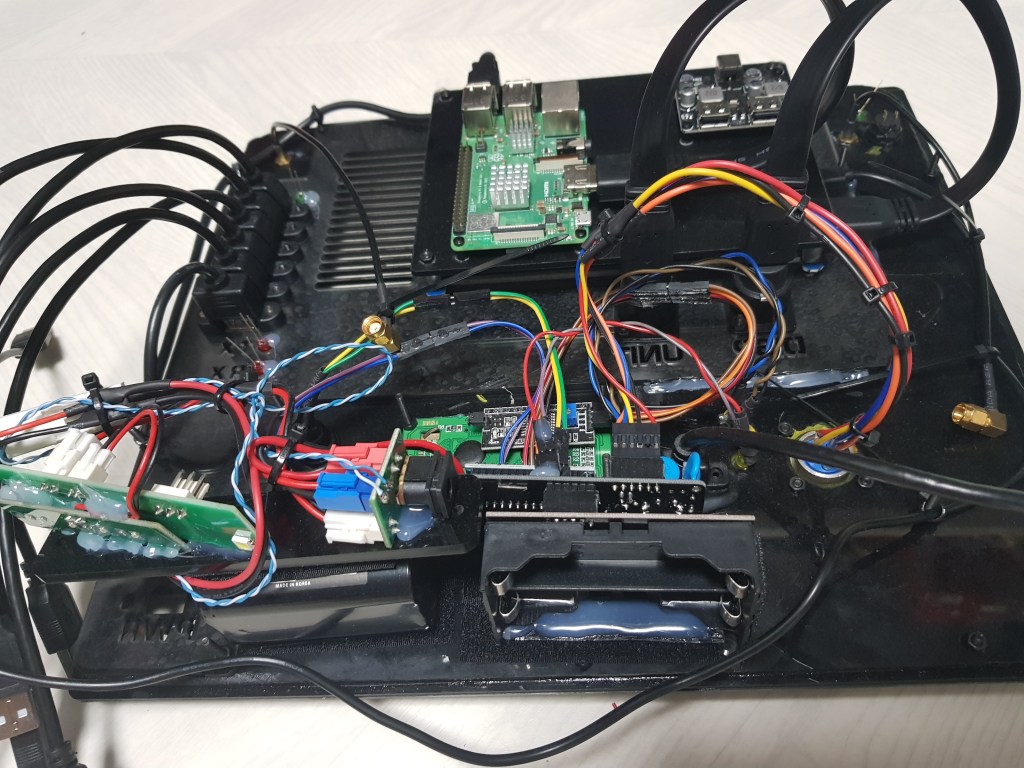
Arduino-driven Geiger Interface
2x Dual SBM-20 Soviet-era Geiger Tubes
16×2 i2c LCD
5V to 9V DC-DC supply
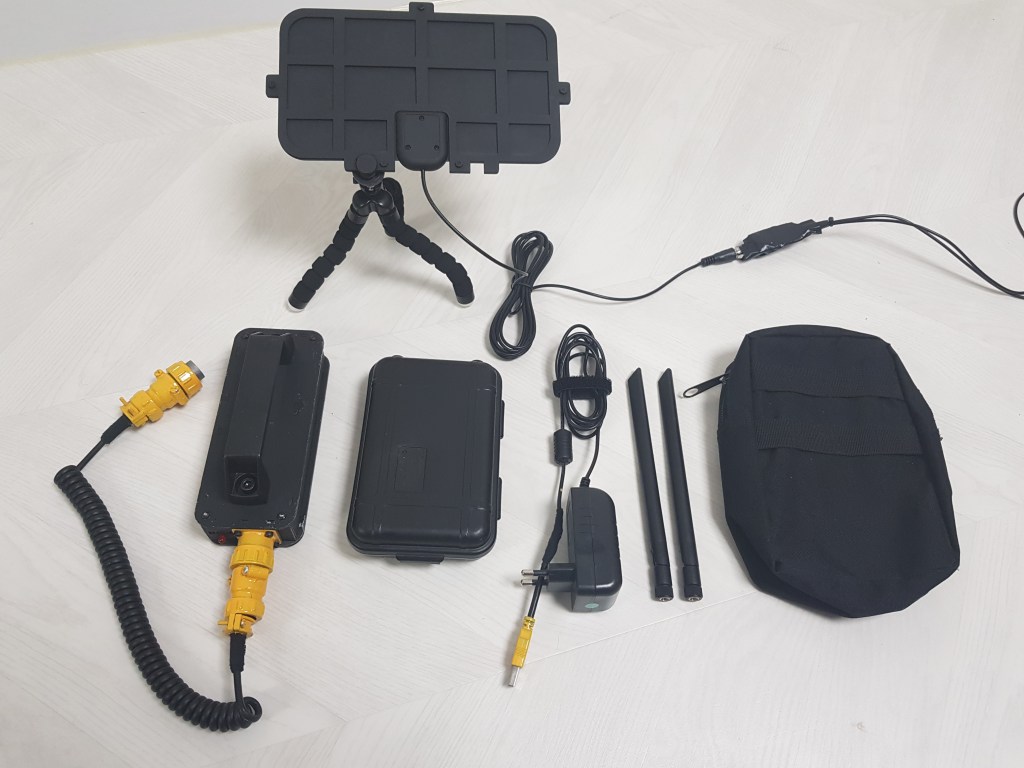
EXTRAS:
RTL-SDR
2x SMA Ports
6x USB Ports
2x HDMI Input/Output
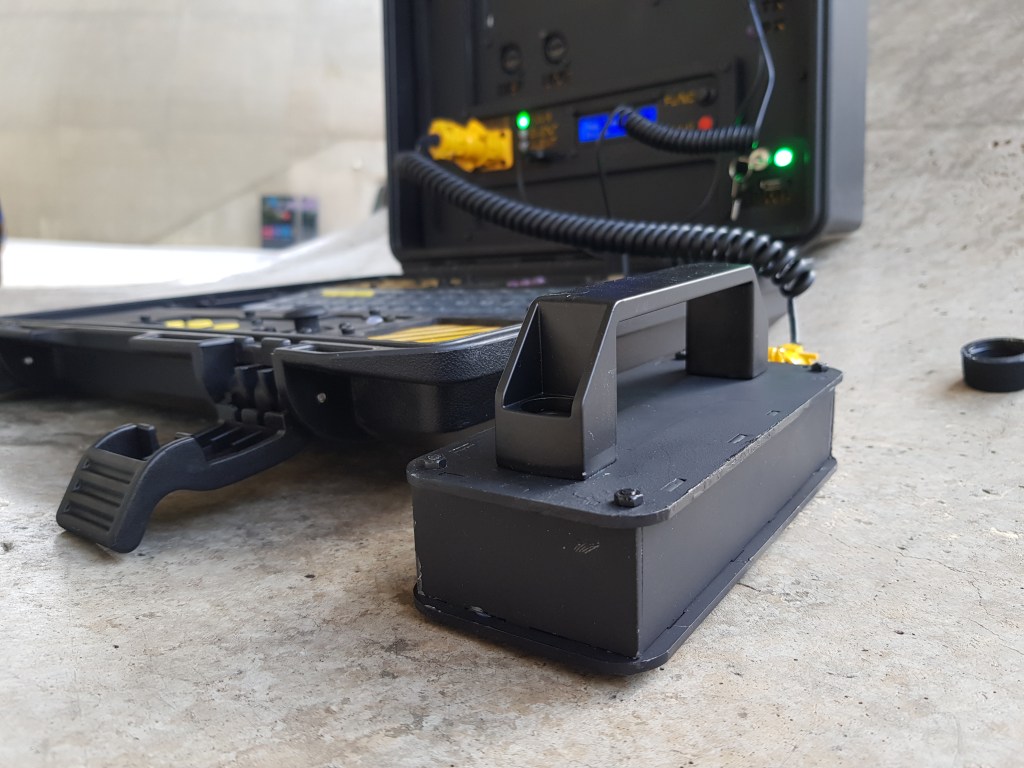
THE BUILD:
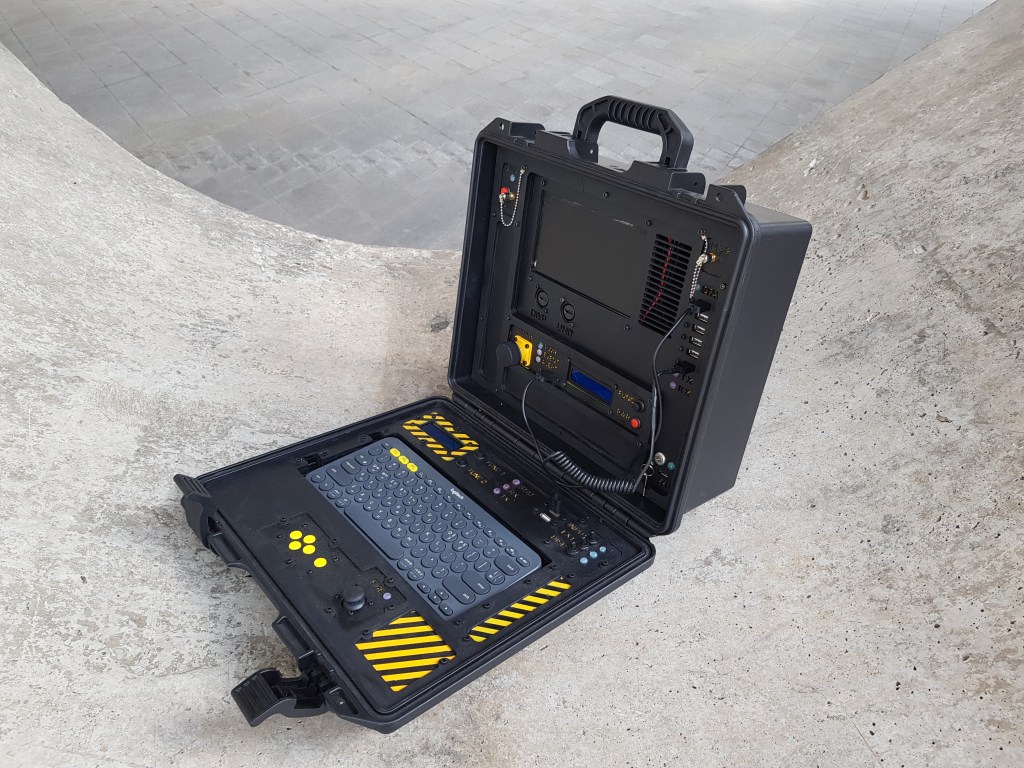
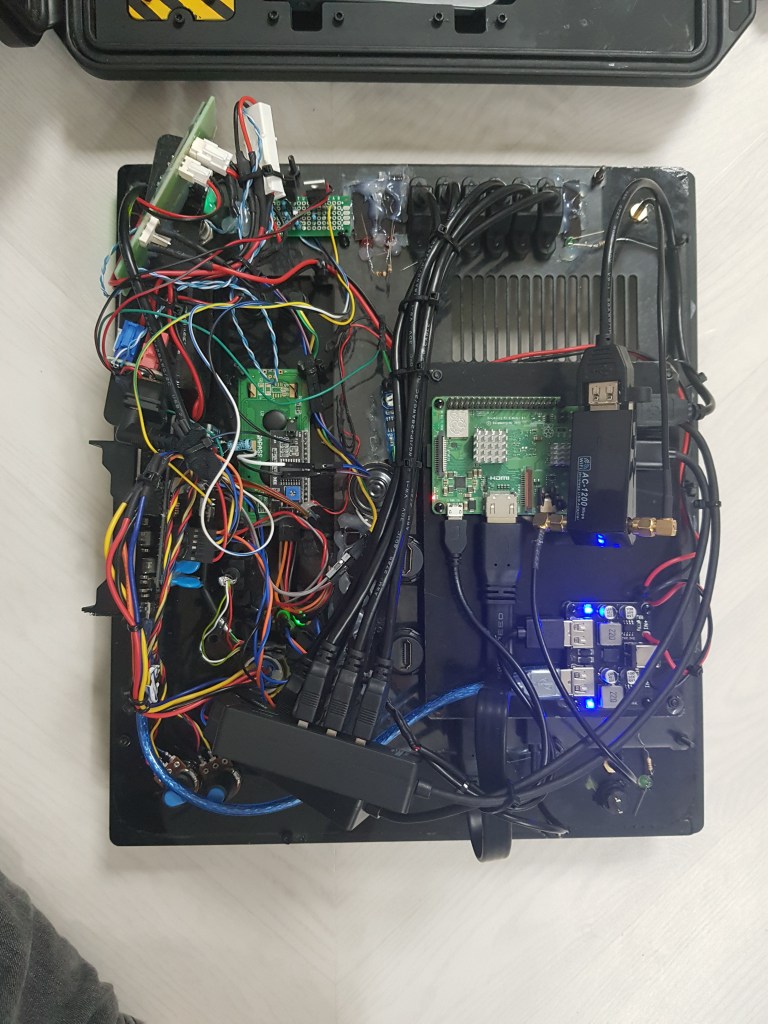
I have no direct access to 3D printers, and I run on a tight budget. As can be seen from the internals, the glamourous story of high tech military-industrial complexes creating boutique military hardware falls down flat when you actually scrutinize my electronics and realize it was probably made in a cave with scrap. The battery is from a vacuum cleaner, the battery sensor is of questionable design, the Geiger counter is a ball of wire but works quite well, the amount of USB ports are an afterthought (and way too many), and well, its all very silly.
But it works, and it works without any issue.
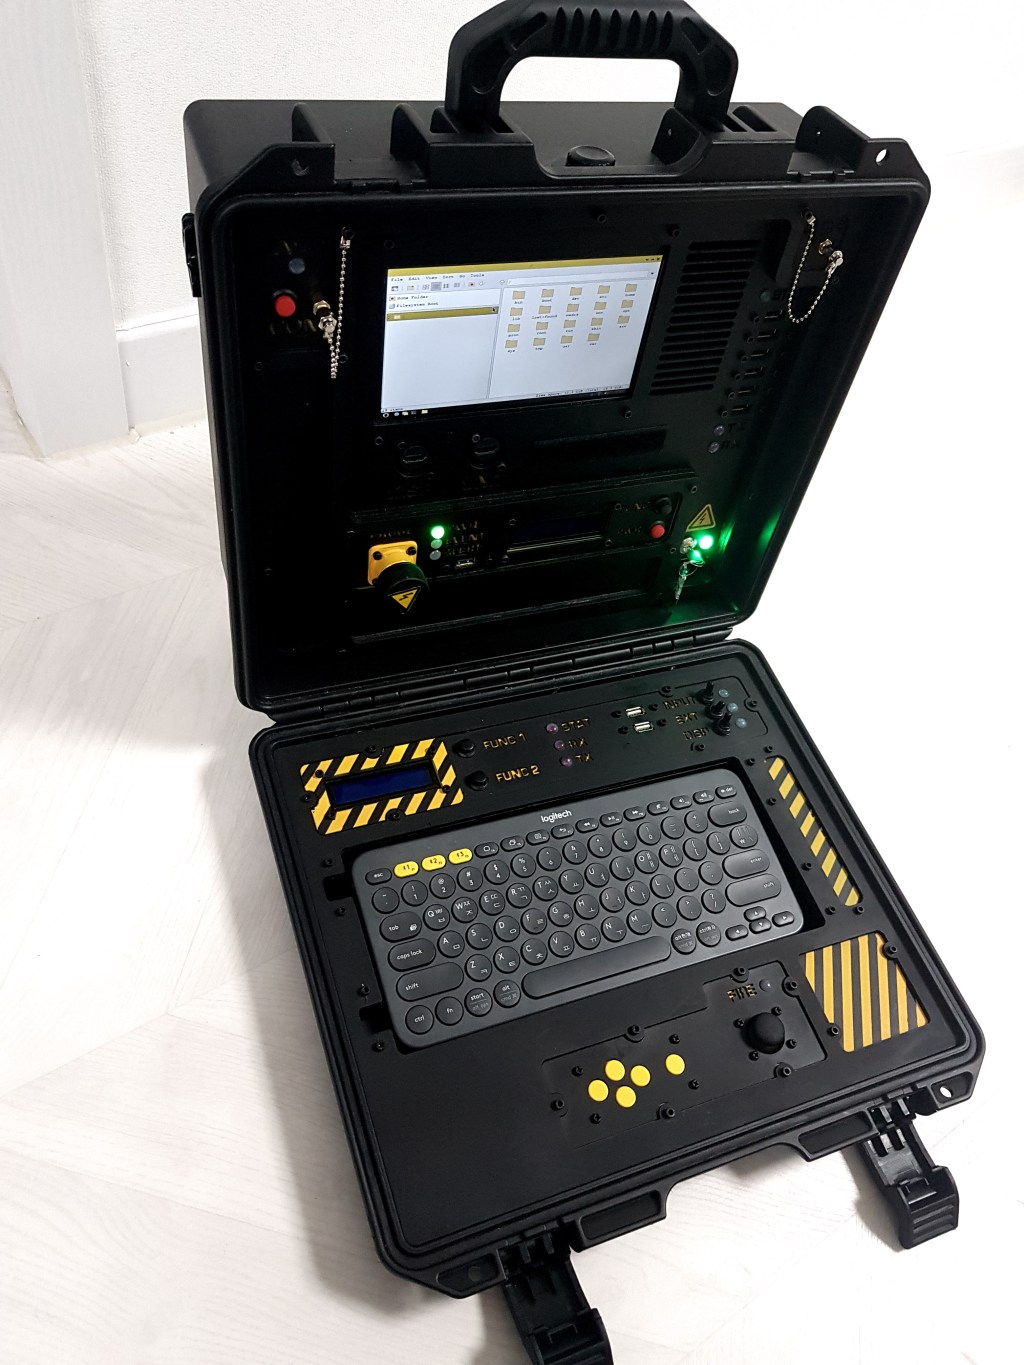
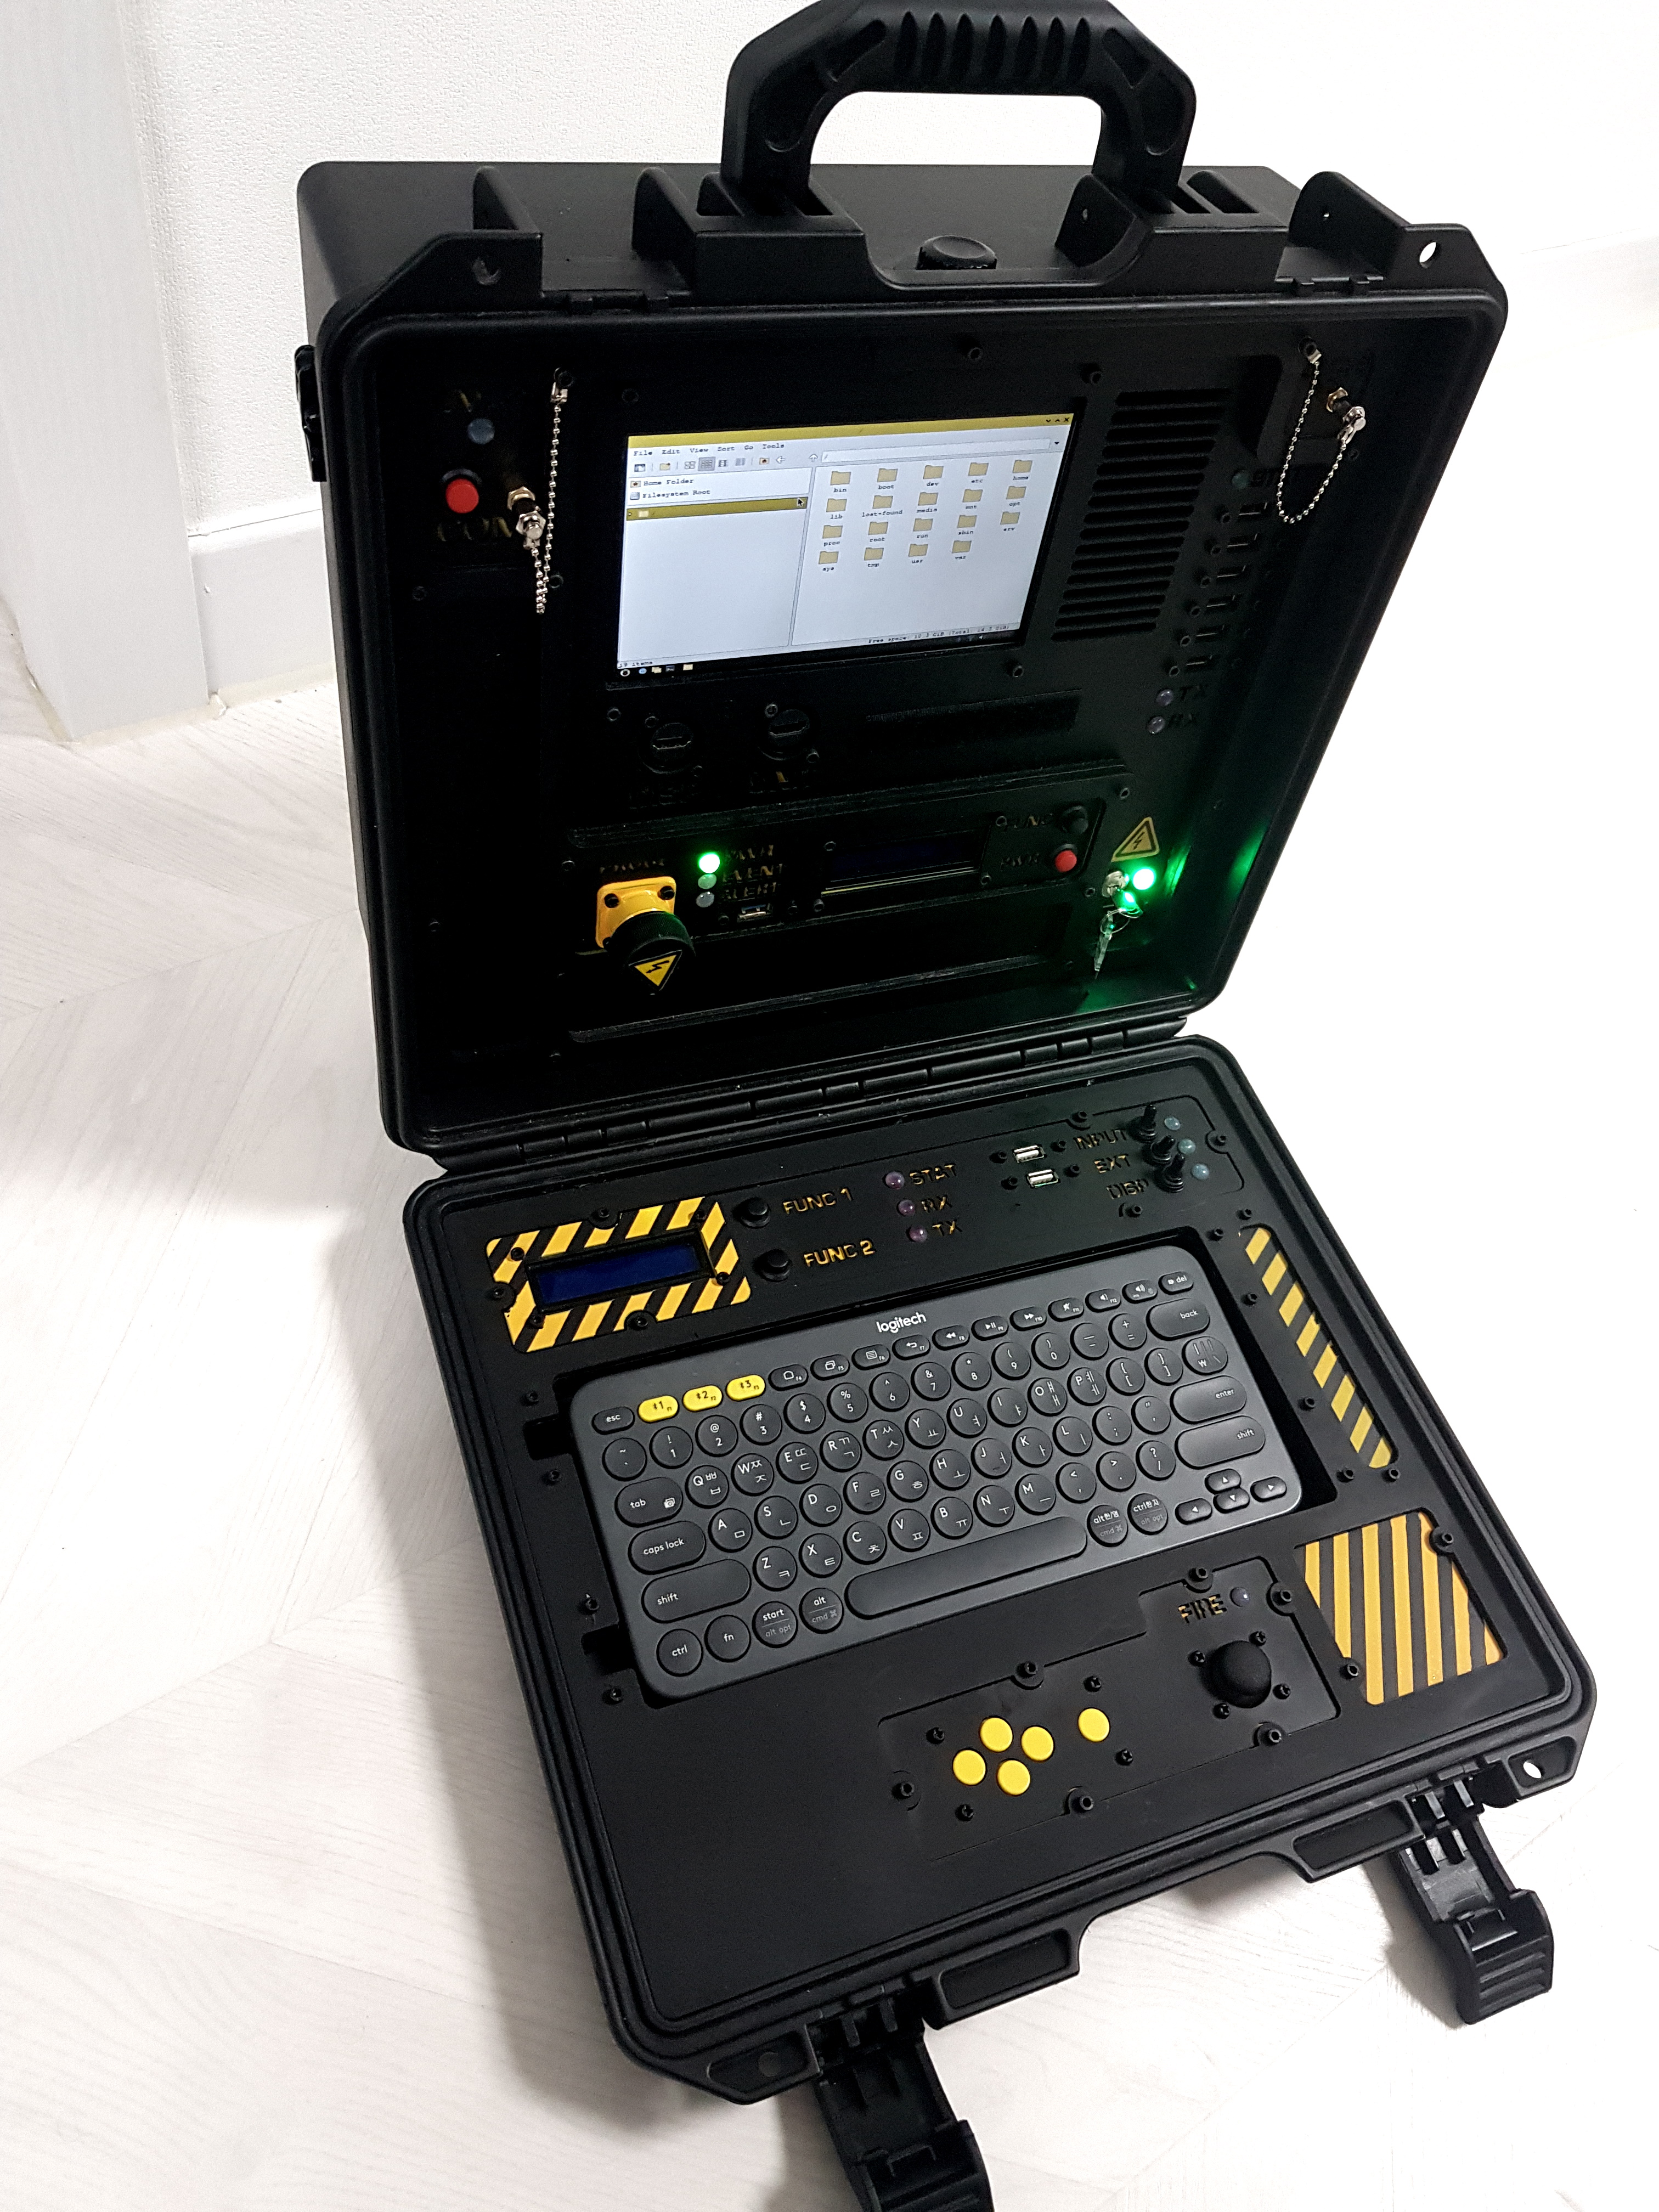
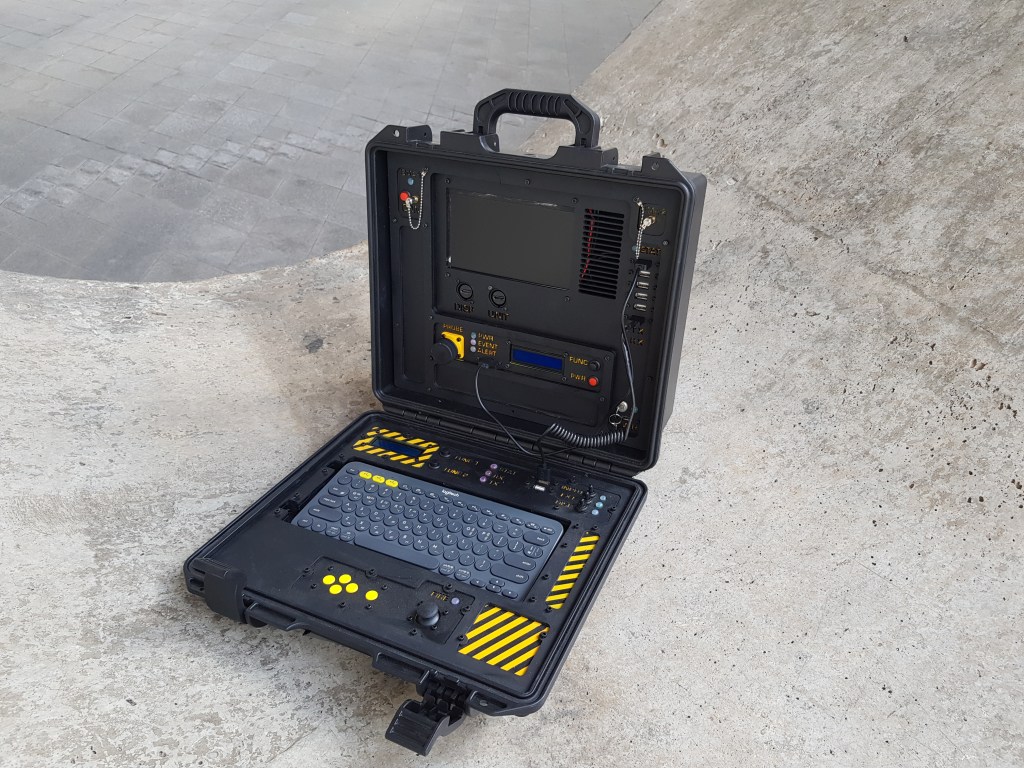
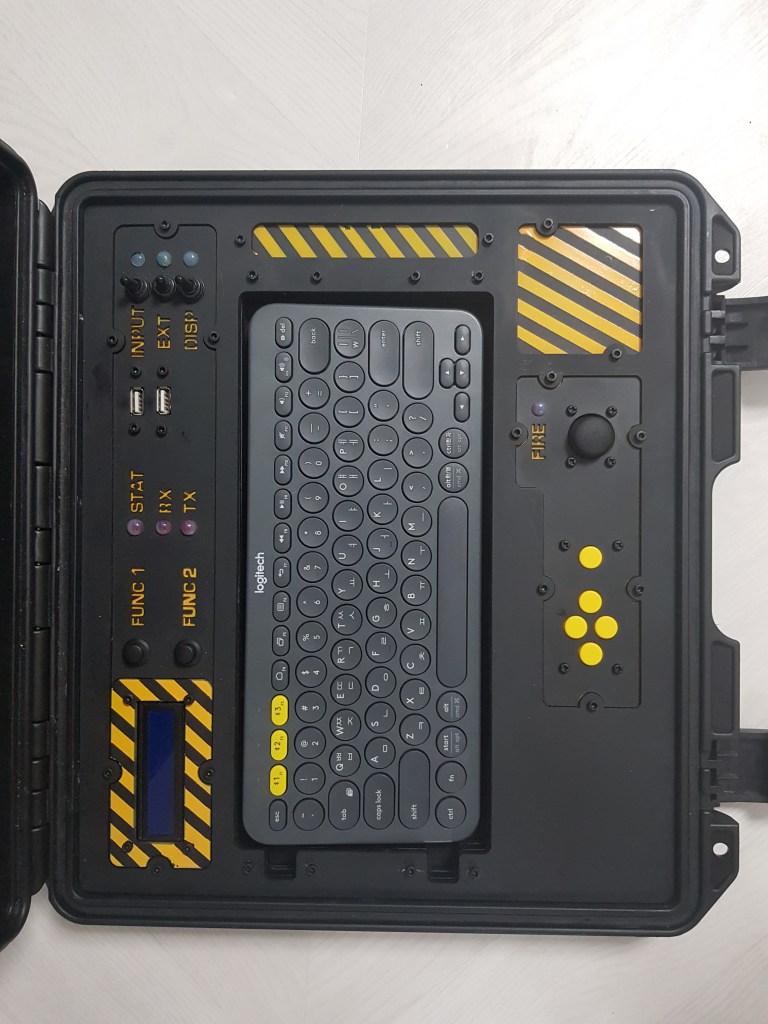
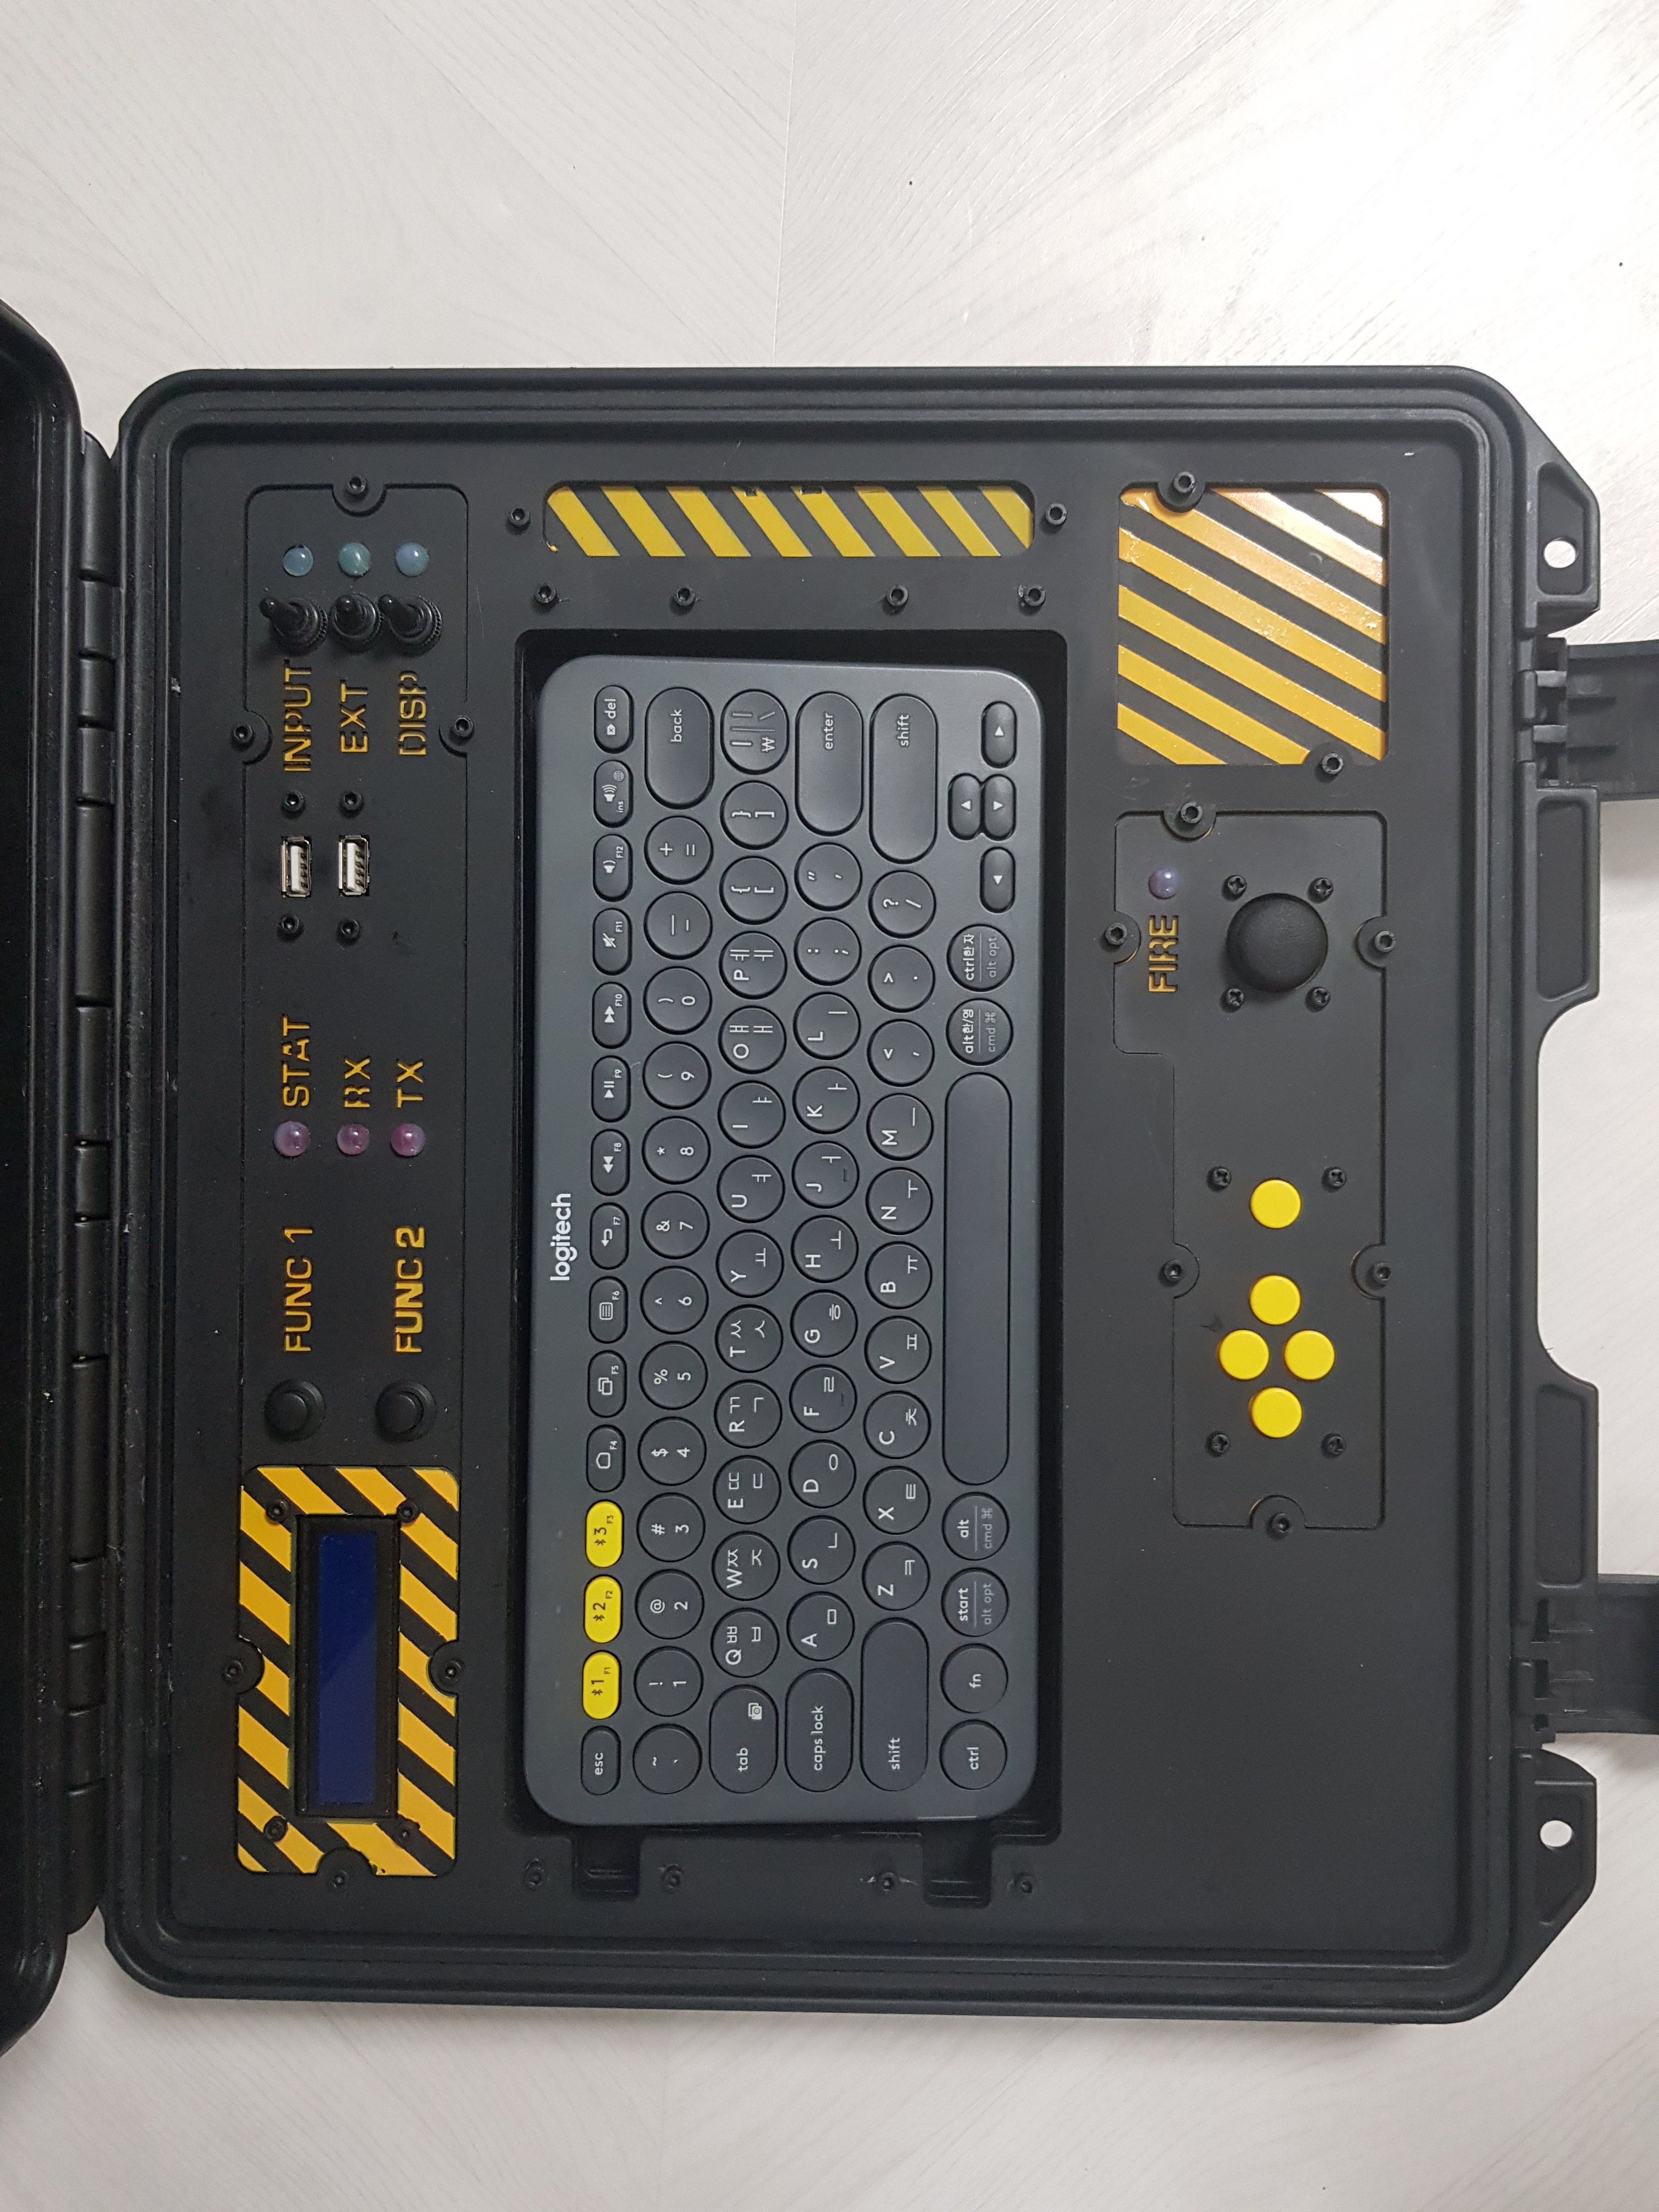
The keyboard (quite nicely shoehorned into the lid of the waterproof case, unlike the, um, actual main panel…) is a combination of wireless Logitech keyboard bunker (a carefully planned slot with magnets holds the keyboard in place), and an Arduino Leonardo connected to a small joystick, click function being right-click, a left-right-up-down set of buttons, and a FIRE button connected to a red LED when pressed. All of which becomes a USB controller when connected with USB to the main panel. This means that you could survive without a mouse, having the same functions available. Of course, the entire thing is reprogrammable, and the little panels were supposed to be removeable for prototyping, but I kinda just got tired and never developed it further. Maybe next time….
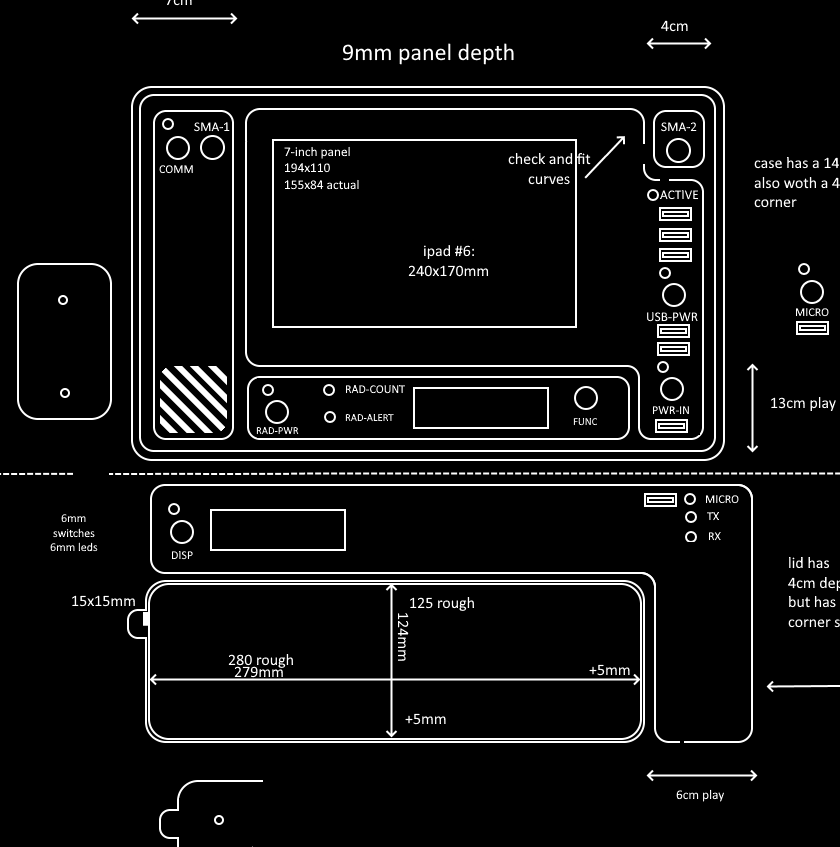
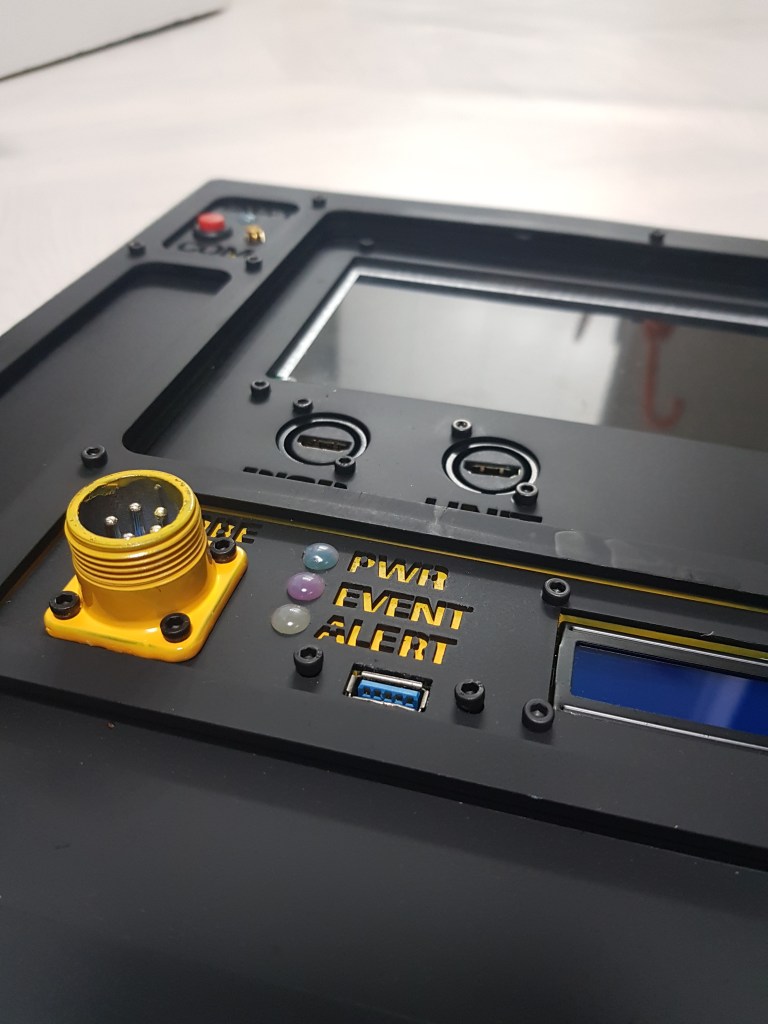
The main feature of the project really is the use of acrylic panels. I wanted a rapidly created item, and the acrylic panels can certainly be sliced out by a local lasercutter in about a few minutes. Not that it aCtuAlLy took a few minutes – I did many trips, much stressing over whether I had made the right dimensioning, realizations I had forgotten some hole, or that something was actually smaller or larger than I thought it was. Nonetheless, I personally am in deep love with the result of lasercutting, and would do it again. Of course, if I could do it again, many things would be different – I don’t need so many USB ports, ethernet would have been nice, audio jacks would have been nice, and the USB-C of the raspberry 4 would have made life so much easier. But this first project taught me a LOT. I had vast amounts of fun, and the device that remains will prove functional and dramatic, a cool thing to show off.
WHY THO?
A Raspberry Pi is a very nice thing. Its light weight and flexible processing power shouts out for it to be made into a mini-computer or laptop, which many people do. But what happens when science fiction, cosplay, horror, and physical computing combine? You end up with a cyberdeck with intimidating military looks and a built-in Geiger counter for measuring radiation.
As the fake (his)story above suggests, I, like Neill Blomkamp, am South African. I also had a deep interest in measuring radiation, starting when I had the interesting opportunity to visit the nuclear power plant at Pelindaba, home of the 4 nuclear bombs that South Africa manufactured in the (1980s?).

It was around 2001, and at time, the South African nuclear agency was working very hard to shed its previous image of a mysterious, highly secretive government organization who faced even more serious PR issues than most nuclear agencies in that it had the unenviable problem of having been the producer of the big, bad old South Africa’s atomic weapons program. Perhaps that is why a 12-year old like me would be allowed to visit and be given a very detailed tour. As a bonus, and because my mother asked nicely, I got to borrow a Geiger counter for a month. I was mesmerized. Had no idea how it worked or what the readings meant, but I diligently went exploring my neighborhood and every nook and cranny of my house. The best I could find was the CRT screens which created ominously high readings. Could it be that mom was always right in saying: “Don’t sit so close to the TV: it’ll mess up your eyes”?
Time went by, I studied electronics, moved to China, moved to Korea, and finally decided the time had come to build a Geiger counter. After much experimenting, I finally developed an Arduino driven device that I used in teaching physics and Arduino coding. The idea also stuck in my mind to add styling and atmosphere to this device – after all, the appeal of Geiger counters is often the doom, the horror, the scariness of invisible radiation. Perhaps that is also the attraction felt by Chernobyl holidaymakers?
Beyond, I want a rad-counter like this to use for emplaced radiation monitoring – an untested theory I have is that when days of micro-dust arrive, ambient radiation levels increase. I have anecdotal evidence, but having emplaced counters would let me have a better idea of what is going on.
ISSUES:
BATTERY: So, the battery isn’t much of a battery – its more of a UPS. I can run the thing for about a half hour before it dies. Adding a separate battery for the LCD screen would make things better.
UNDERVOLTAGE: Another issue is that the voltage the battery to DC-DC supply provides something that is less than the 5.1V that seems to make Raspberry Pi-s happy and satisfied, hence my unit keeps complaining. That the case though, no ill effects? So after a while, I just disabled the warnings as follows:
sudo nano /boot/config.txt
Add the following lines right at the bottom, saved, closed, sudo reboot. Problem solved (?)
avoid_warnings=1
avoid_warnings=2
PANEL CLIPS:
I often find myself accessing the inside of the device to fiddle with the wiring, and the main panel is quite easy to pop out. Too easy. Most devices, such as [back7] and his recovery device are squeezed into a pelican case, and mine is too. Or, was supposed to. Actually, it doesn’t really fit in snugly at all. Tilt the thing too far, and it will crash out. Options to fix could include screws going in from the sides, but my drill up and died last year, and I’ve been unable to drill anything since then. This issue is probably the most important flaw currently. The takeaway is that next time a well-though out solution must be designed in.
Contact me on instagram: @paulhoets
Paul Hoets is a freelance maker who lives in South Korea. If you liked this article and would like to contribute to his empire of dirt, silicon and tech. education, buy him a coffee!


16 responses to “Cyberdeck Build: R.A.T.I.S.”
[…] you like it when a hack has a little backstory, then you’re going to love this cyberdeck build log, the first half of which reads like a [Tom Clancy] novel. And the build itself looks the part, like […]
Awesome. Thanks for the article!
Nice looking build and fun story. To be clear though, there is no actual Geiger counter onboard, correct?
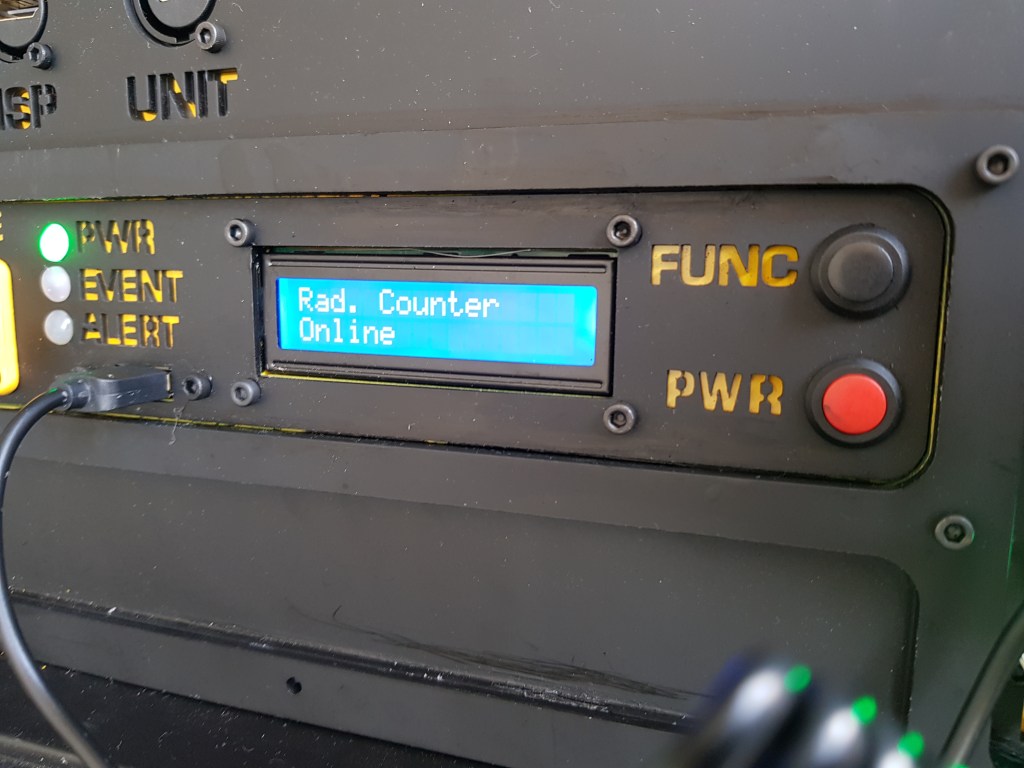
No! There is! That was half the point. ^^ The geiger counter is fully functional, and is my fourth iteration of a design I use.
seen on https://hackaday.com/2020/11/24/over-the-top-cyberdeck-is-really-a-geiger-deck/
Cool cool! Happy to see it here.
Ah OK thanks. You said it was a ball of wire, so that had me confused.
I’m planning to do another write up soon and explain a bit more about the Geiger counter story.
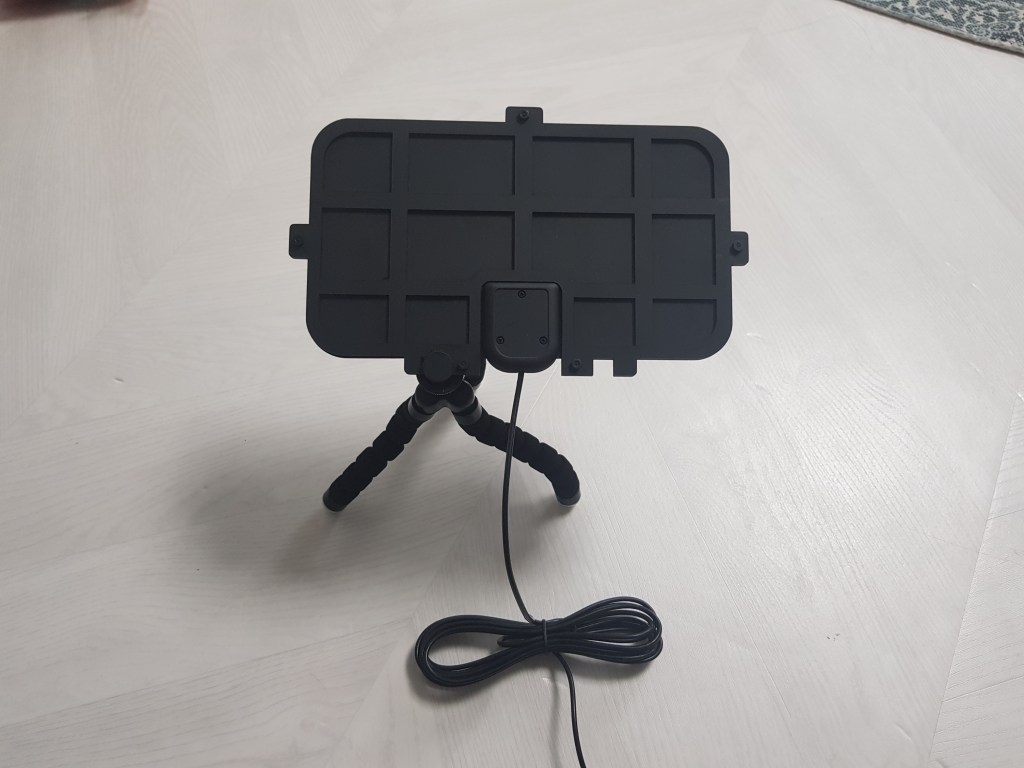
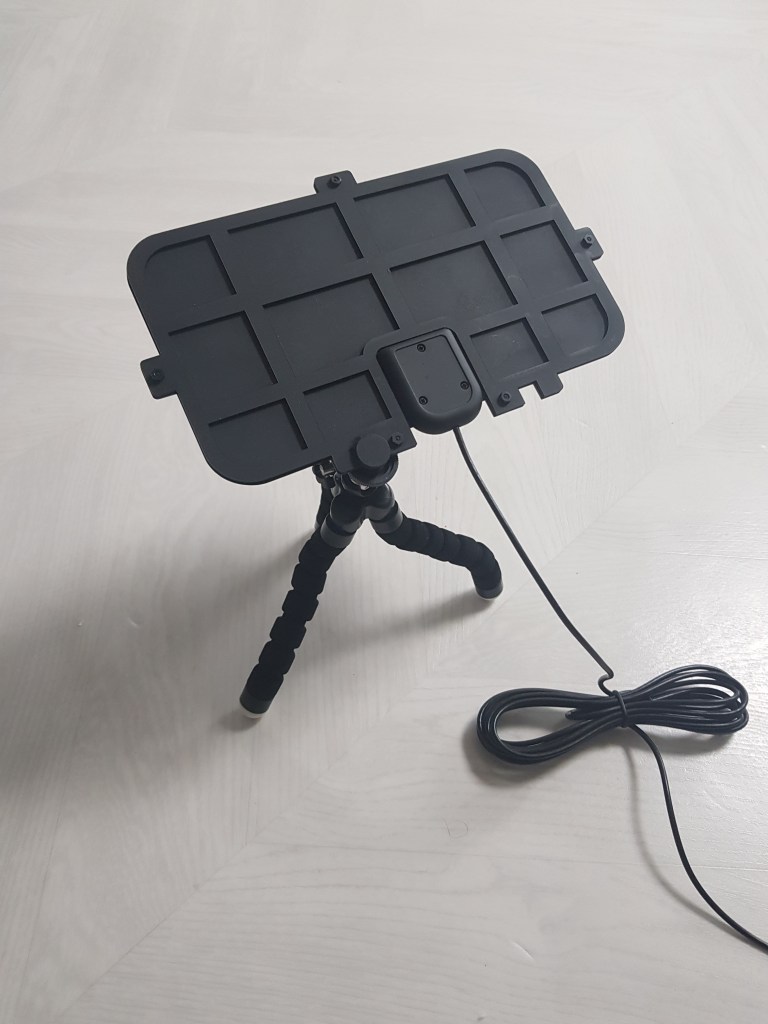
Is that an sdr and I’m guessing the the flat bit on the tripod is an antenna. What type of antenna is it? Please let me know if im wrong.
Yup, you’re right. The antenna is for satellite TV broadcast range, so its not the best for picking up weather satellites. My goal is to pick up weather satellite images, but it seems I’ll need an antenna a bit more……helical.
[…] you like it when a hack has a little backstory, then you’re going to love this cyberdeck build log, the first half of which reads like a [Tom Clancy] novel. And the build itself looks the part, like […]
[…] cosplay and actual science, as well as an origin tale that entails the two, this R.A.T.I.S. (Remote Assault and Tactical Intelligence System) cyberdeck by Paul Hoets is a true retrofuturistic work of […]
[…] cosplay and actual science, as well as an origin tale that entails the two, this R.A.T.I.S. (Remote Assault and Tactical Intelligence System) cyberdeck by Paul Hoets is a true retrofuturistic work of […]
[…] cosplay and actual science, as well as an origin story that entails the two, this R.A.T.I.S. (Remote Assault and Tactical Intelligence System) cyberdeck by Paul Hoets is a true retrofuturistic work of […]
[…] cosplay and actual science, as well as an origin story that entails the two, this R.A.T.I.S. (Remote Assault and Tactical Intelligence System) cyberdeck by Paul Hoets is a true retrofuturistic work of […]
[…] cosplay and actual science, as well as an origin story that entails the two, this R.A.T.I.S. (Remote Assault and Tactical Intelligence System) cyberdeck by Paul Hoets is a true retrofuturistic work of […]