Just like the article I made on the BME280 and Blynk, this guide shows the same thing, except with a view to the BME280, a really nice sensor that can calculate air pressure, humidity, temperature, and by extension, altitude (well, as well as an extremely cheap, extremely uncalibrated sensor can tell altitude, and to what extent you would trust it…)
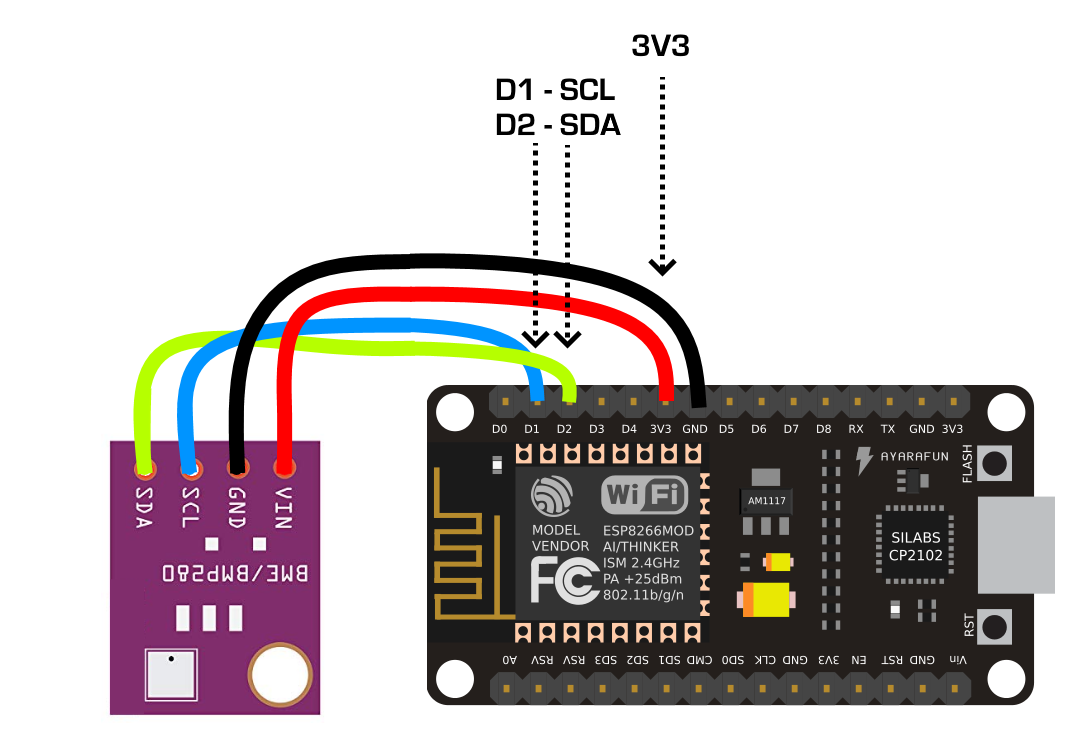
Connect as follows, taking care not to hurt the fragile little sensor.
Upload the following code to your NodeMCU. If you get library warnings, you should know what to do.
If you don’t know what to do, you can freely ask me for help, and you’ll get an answer at a lag time inversely proportional to how much use of this page you make.
#include <Wire.h>
#include <Adafruit_Sensor.h>
#include <Adafruit_BME280.h>

#define SEALEVELPRESSURE_HPA (1013.25)

Adafruit_BME280 bme;

void setup() {
  Serial.begin(9600);

  if (!bme.begin(0x76)) {
    Serial.println("Error, check wiring!");
    while (1);
  }
}

void loop() {
  Serial.print("Temp:");
  Serial.print(bme.readTemperature());
  Serial.println("*C");

  Serial.print("Pressure:");
  Serial.print(bme.readPressure() / 100.0F);
 Serial.println("hPa");

  Serial.print("Altitude:");
  Serial.print(bme.readAltitude(SEALEVELPRESSURE_HPA));
  Serial.println("m");

  Serial.print("Humidity:");
  Serial.print(bme.readHumidity());
  Serial.println("%");

  Serial.println();
  delay(1000);
}
If you get serial data popping out that looks reasonable enough, then you can gain some faith in your own smartness, and in the fidelity of the sensor you bought (well, for the time being…)
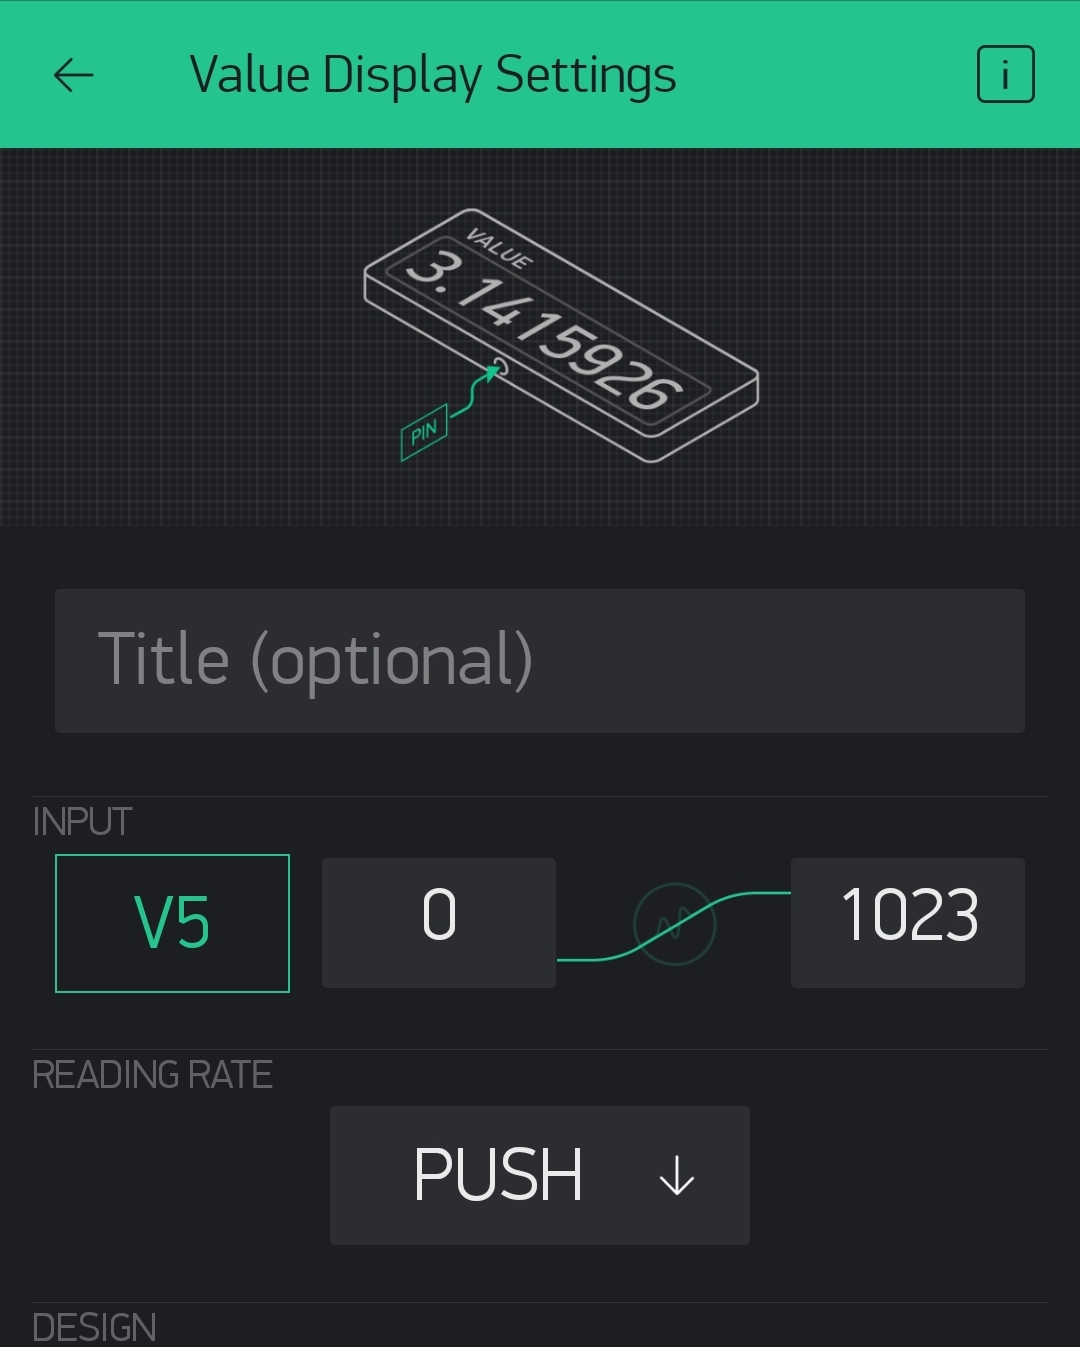
Next, open a new Blynk project, add four Value Displays, and set each to the four virtual pin channels you will need (V5, V6, V7, V8).

Next, catch the authentication code you sent to yourself via the project settings, and along with a stable wifi SSID and its password, fill them into your code at auth[], ssid[], and pass[].
#include <ESP8266WiFi.h>
#include <BlynkSimpleEsp8266.h>

#include <Wire.h>
#include <Adafruit_Sensor.h>
#include <Adafruit_BME280.h>

#define SEALEVELPRESSURE_HPA (1013.25)

Adafruit_BME280 bme;

char auth[] = "xxxxx";
char ssid[] = "xxxxx";
char pass[] = "xxxxx";

BlynkTimer timer;

void setup() {
  if (!bme.begin(0x76)) {
    Serial.println("Error, check wiring!");
    while (1);
  }
    Blynk.begin(auth, ssid, pass);

  // Setup a function to be called every second
  timer.setInterval(1000L, sendSensor);
}

void loop() {

    Blynk.run();
  timer.run();
}

void sendSensor()
{
  //don't send more that 10 values per second.
  Blynk.virtualWrite(V5, bme.readTemperature());
  Blynk.virtualWrite(V6, bme.readPressure());
  Blynk.virtualWrite(V7, bme.readAltitude(SEALEVELPRESSURE_HPA);
  Blynk.virtualWrite(V8, bme.readHumidity();
}
Upload your code, press the play button on the smartphone UI, and hopefully it all works as it should.
Paul Hoets is a freelance maker who lives in South Korea. If you liked this article and would like to contribute to his empire of dirt, silicon and tech. education, buy him a coffee!