
This guide has been replicated on many a site, but seeing as I have my own site, and times are tough, and I’m in desperate need of traffic, in the hopes of someone out of curiosity heading over to my redbubble.com and buying a sticker, or buying me a coffee, or even asking for tutoring services, I’m putting up my own guide.
Then I can send my students here and make myself look cool.
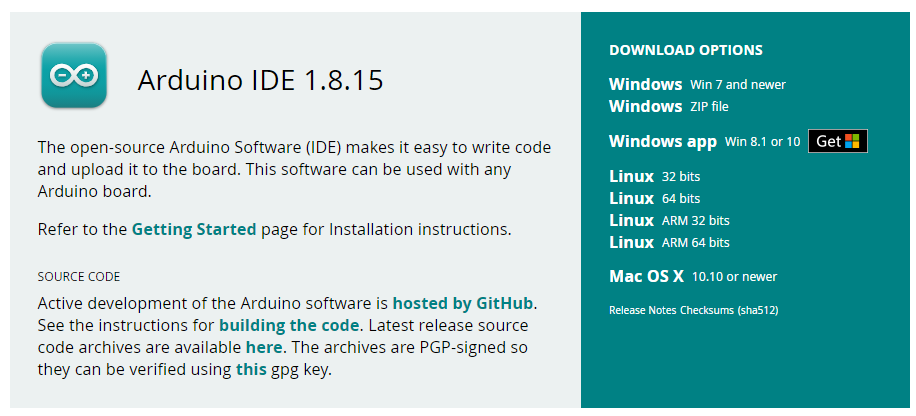
Step 1: Install the Arduino IDE
This goes without saying. The installable version offers more control and power, compared with the web version, so head on over to the Arduino.cc software page, and get the OS appropriate IDE downloaded.
Step 2: Link to the hardware libraries
Open up your freshly intalled Arduino IDE, and click File >> Preferences.
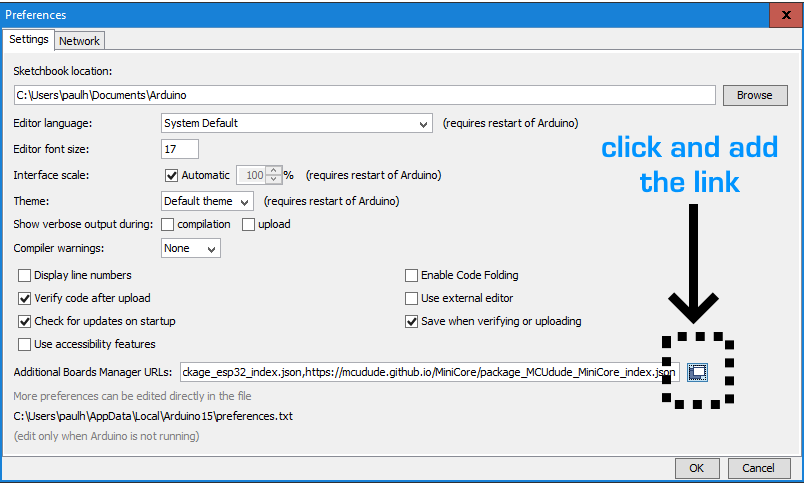
We’ll add a URL that points the Arduino library/hardware updater to an external library. That way we can then use the normal hardware manager to just install it. So, click the button by the Additional Boards Manager URLs, and add to the list:
http://arduino.esp8266.com/stable/package_esp8266com_index.jsonIf there is something already there, such as the link for the ESP-32 hardware, use a comma to separate it:
https://dl.espressif.com/dl/package_esp32_index.json,
http://arduino.esp8266.com/stable/package_esp8266com_index.json
Click OK.
Step 3: Load the ESP8266 hardware libraries
Now head over to Tools >> Board >> Boards Manager.
Search for “esp8266”. The first item you get will be the clear result.
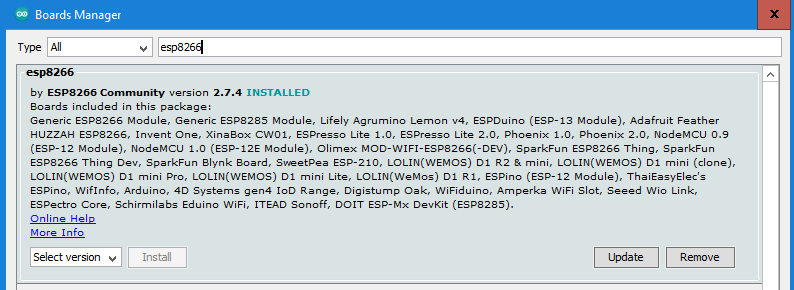
Install it, and once everything is happy, finally…..
Goto Tools >> Boards >> ESP8266 Boards >> NodeMCU 1.0 (or whatever ESP8266 relative you are using)
You’ll get a long list of scary-looking configurations appearing under Tools, but the only one you likely have to mess with is Port, just like usual. Make sure the device is plugged in, select the correct Tools >> Port >> (Com port whatever), upload some simple LED test code, and you are done!
And in case you need it, here are two flavors of test code, one for a single LED on the NodeMCU, the other for running both the LEDs.
//Example 001: One LED
void setup() {
  pinMode(2, OUTPUT);
}

void loop() {
  digitalWrite(2, LOW);
  delay(1000);
  digitalWrite(2, HIGH);
  delay(2000);
}
//Example 002: Two LEDs
void setup() {
pinMode(2, OUTPUT);
pinMode(16, OUTPUT);
}
void loop() {
digitalWrite(2, LOW);
digitalWrite(16, HIGH);
delay(500);
digitalWrite(2, HIGH);
digitalWrite(16 LOW);
delay(500);
}But running LEDs is all fine and good, but it’s a true newbie move.
What else can be done with this coo hardware? Stay tuned for the next article: Cheap and trashy fun with NodeMCU.
Paul Hoets is a freelance maker who lives in South Korea. If you liked this article and would like to contribute to his empire of dirt, silicon and tech. education, buy him a coffee!


3 responses to “Installing ESP8266 in Arduino (NodeMCU)”
[…] lines. Plug in your NodeMCU (if you haven’t installed the hardware library, run through this simple guide), check the COM port, and […]
[…] lines. Plug in your NodeMCU (if you haven’t installed the hardware library, run through this simple guide), check the COM port, and […]
[…] lines. Plug in your NodeMCU (if you haven’t installed the hardware library, run through this simple guide), check the COM port, and […]